
Create your own painting using Morris Louis’s pouring technique.

This was the first of our Art Experiments. My girls fully embraced Louis’s idea of pouring the paint onto the canvas instead of using a brush. I would say two of their finished products look most similar to Louis’s Veils and the other is more like Louis’s paintings with the lines.

At the time the girls made their poured paintings, I hadn’t yet purchased the Golden High Flow Acrylic. Instead, we mixed acrylic we had on hand to make the colors they wanted. That was an interesting process because I had a hard time getting the colors to homogenize (maybe because the paint we had was old?) with each other and even with the water we used to thin it. I felt like Louis using the Magna paint that seemed to come in a different consistency each time he purchased it.


I experimented with different ways to mix the paint including using an immersion blender. The paint came out very foamy. Anyhow, the Golden Acrylics, by comparison, had an amazing consistency and opacity. I used Golden High Flow Acrylic, but I wonder how Golden High Flow Acrylic – Transparent would have been instead. The regular acrylic is so opaque that you can’t see other colors underneath as you can in Louis’s Veil paintings. If you try the transparent acrylics, send me a picture. I would love to see how it is different. Maybe that will be my next experiment!
Supplies For Frame:

Painting Supplies:

- Assembled frame
- Unprimed canvas
- Scissors
- Golden Artist Colors
- Nails
- Hammer
Supplies for Stretching a Painting:
- Assembled frame
- Painting on canvas
- Canvas Stretching Pliers
- Staple Gun
- Staples

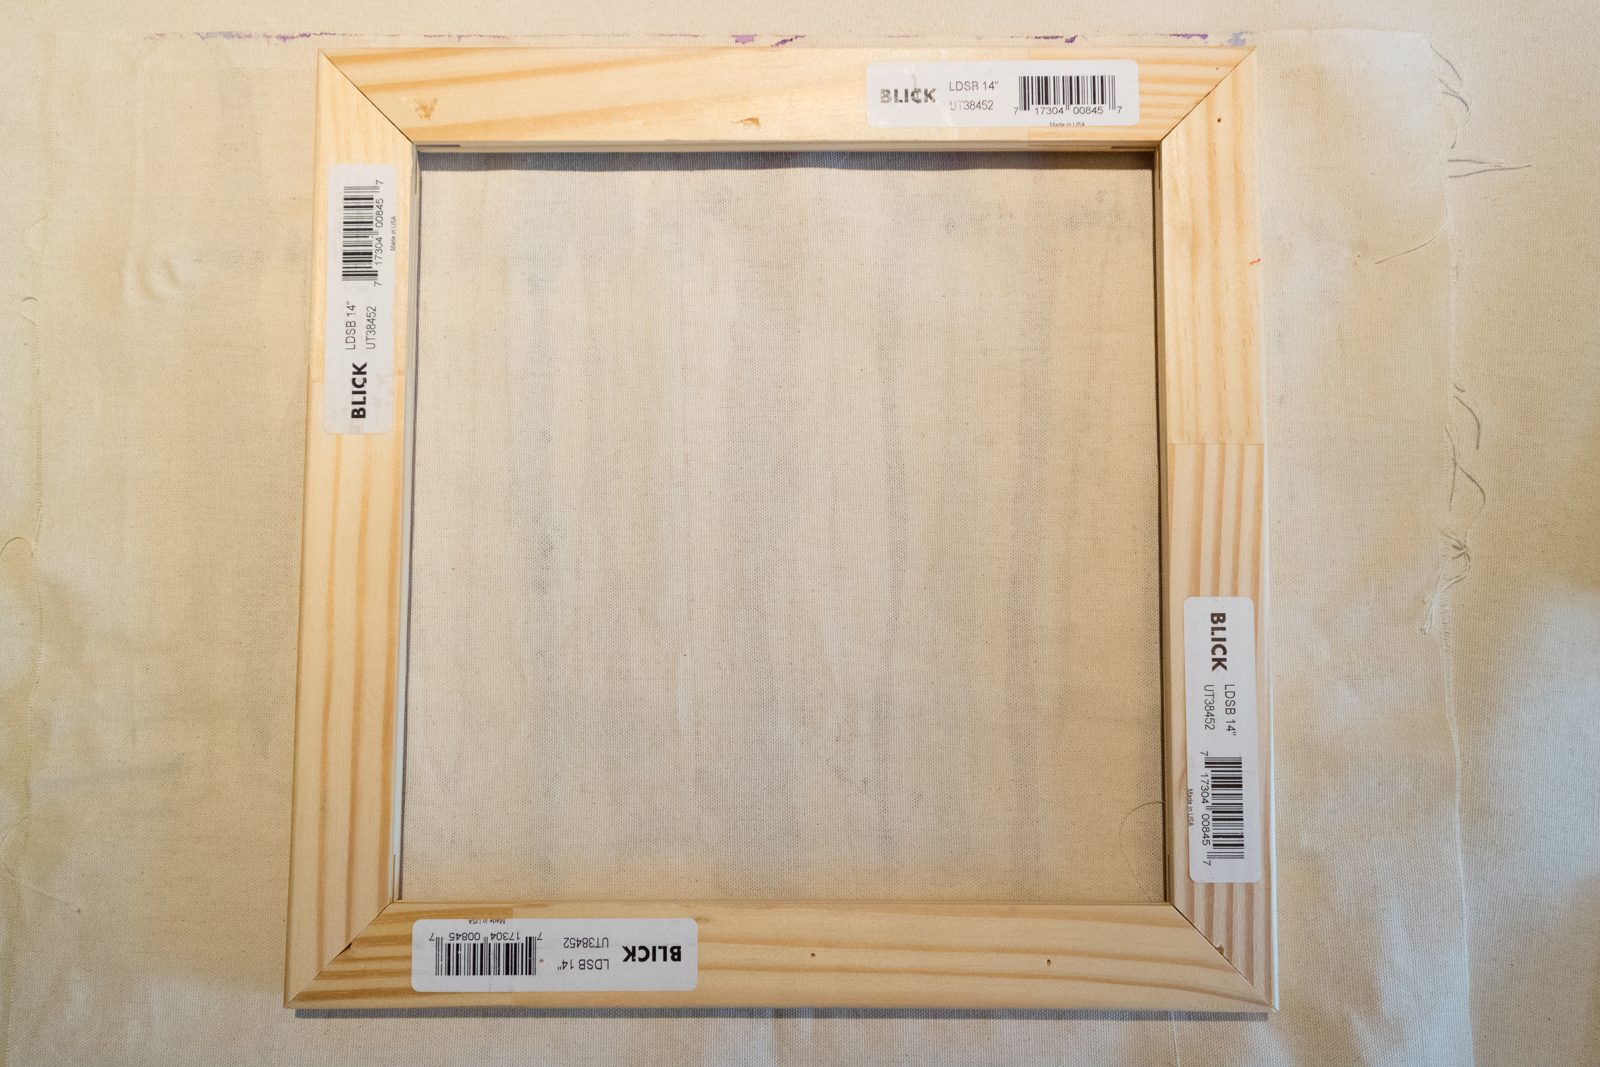
Putting the frame together:
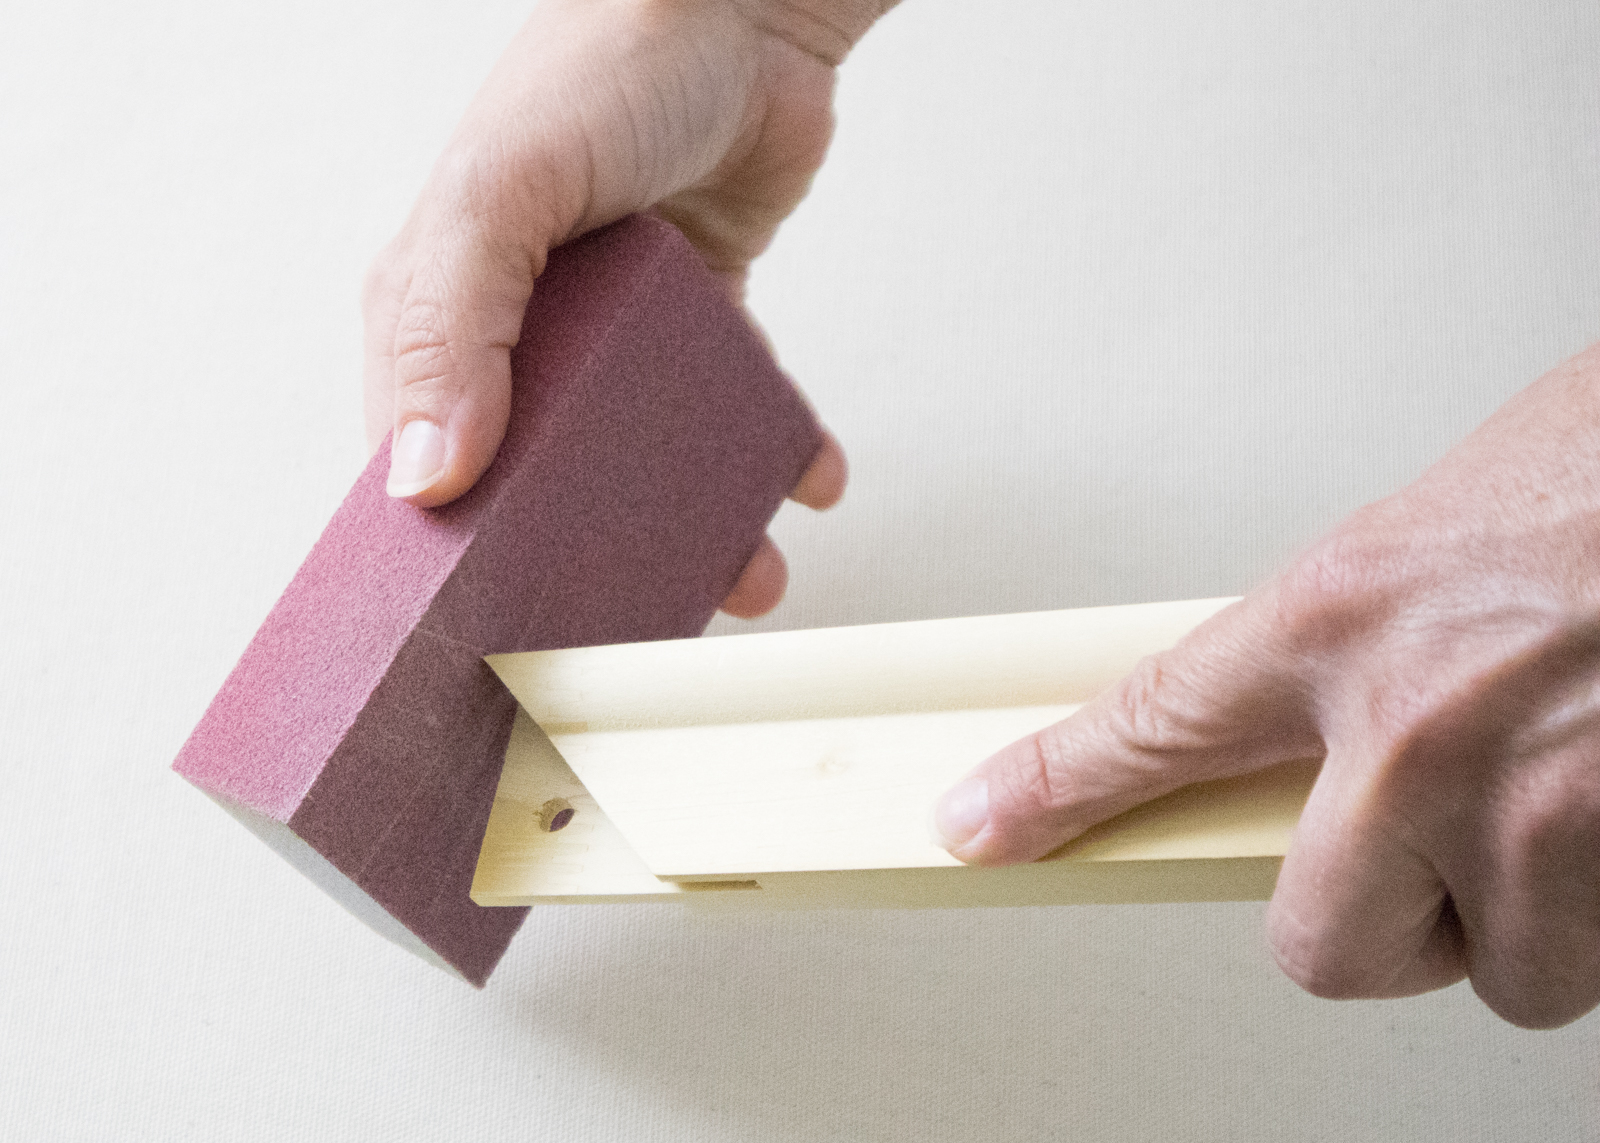
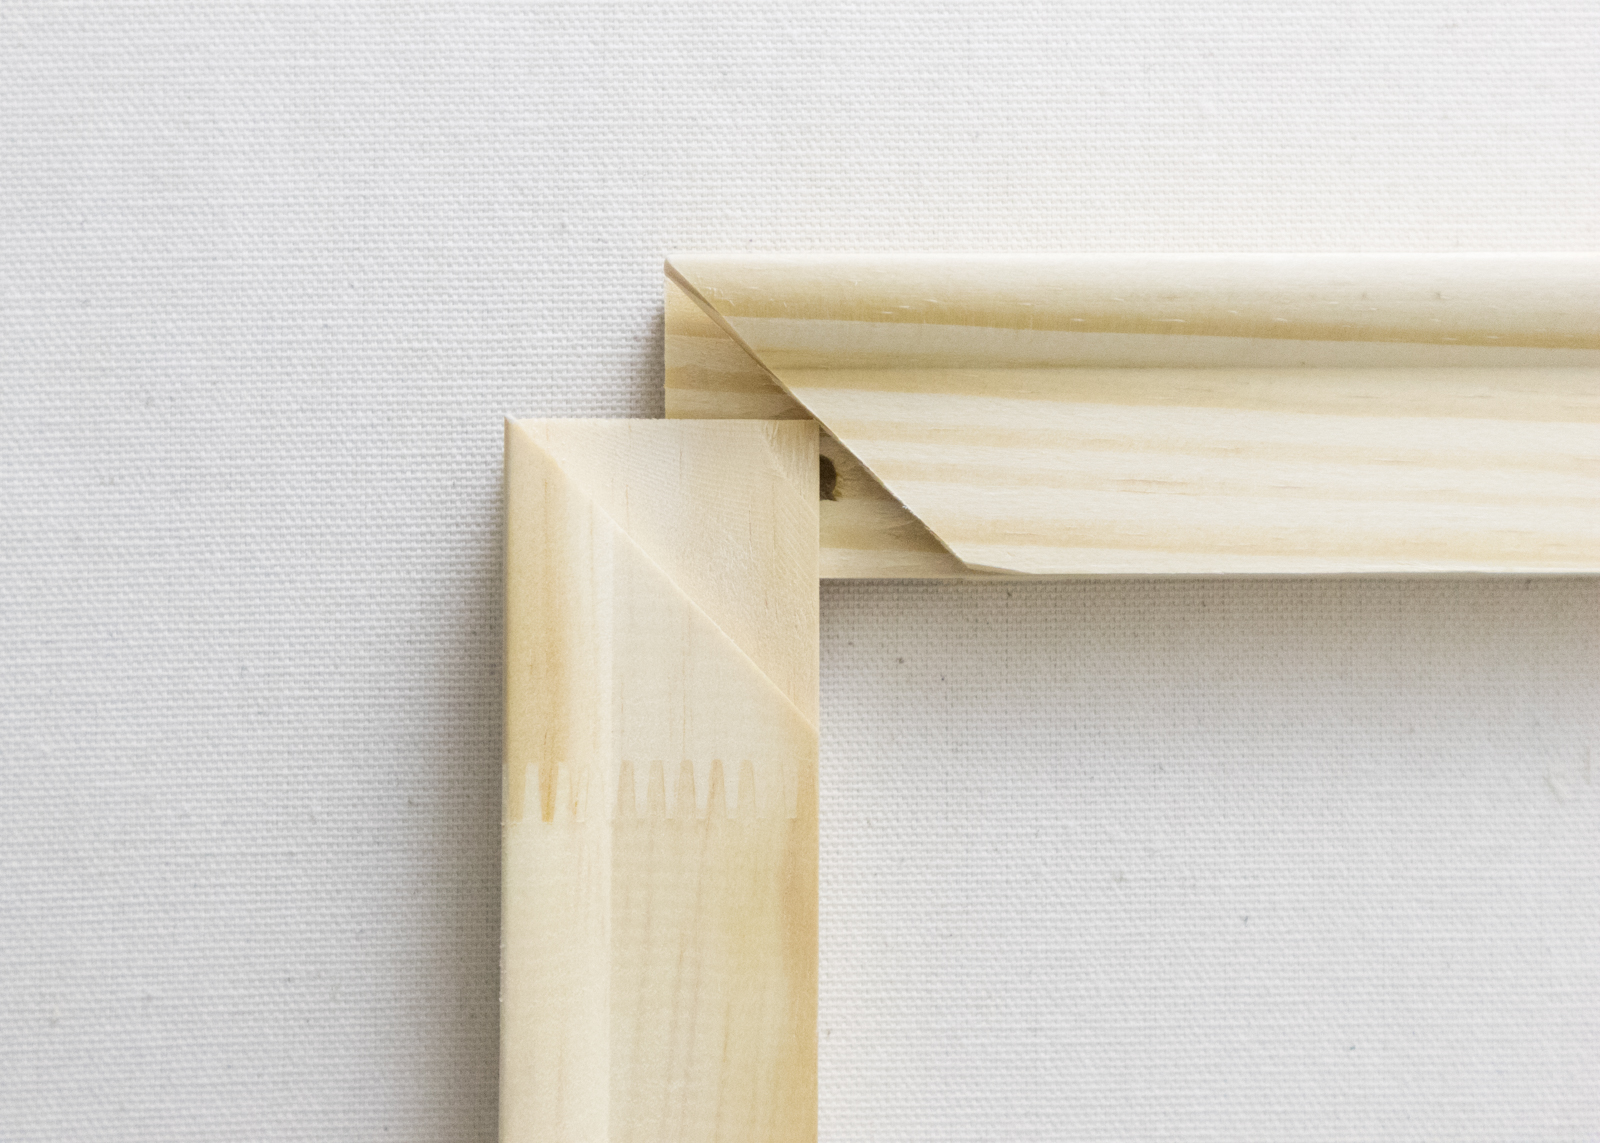
1. Sand all of the edges with a sanding sponge. Make sure your pieces are facing the same way and connect the interlocking pieces.
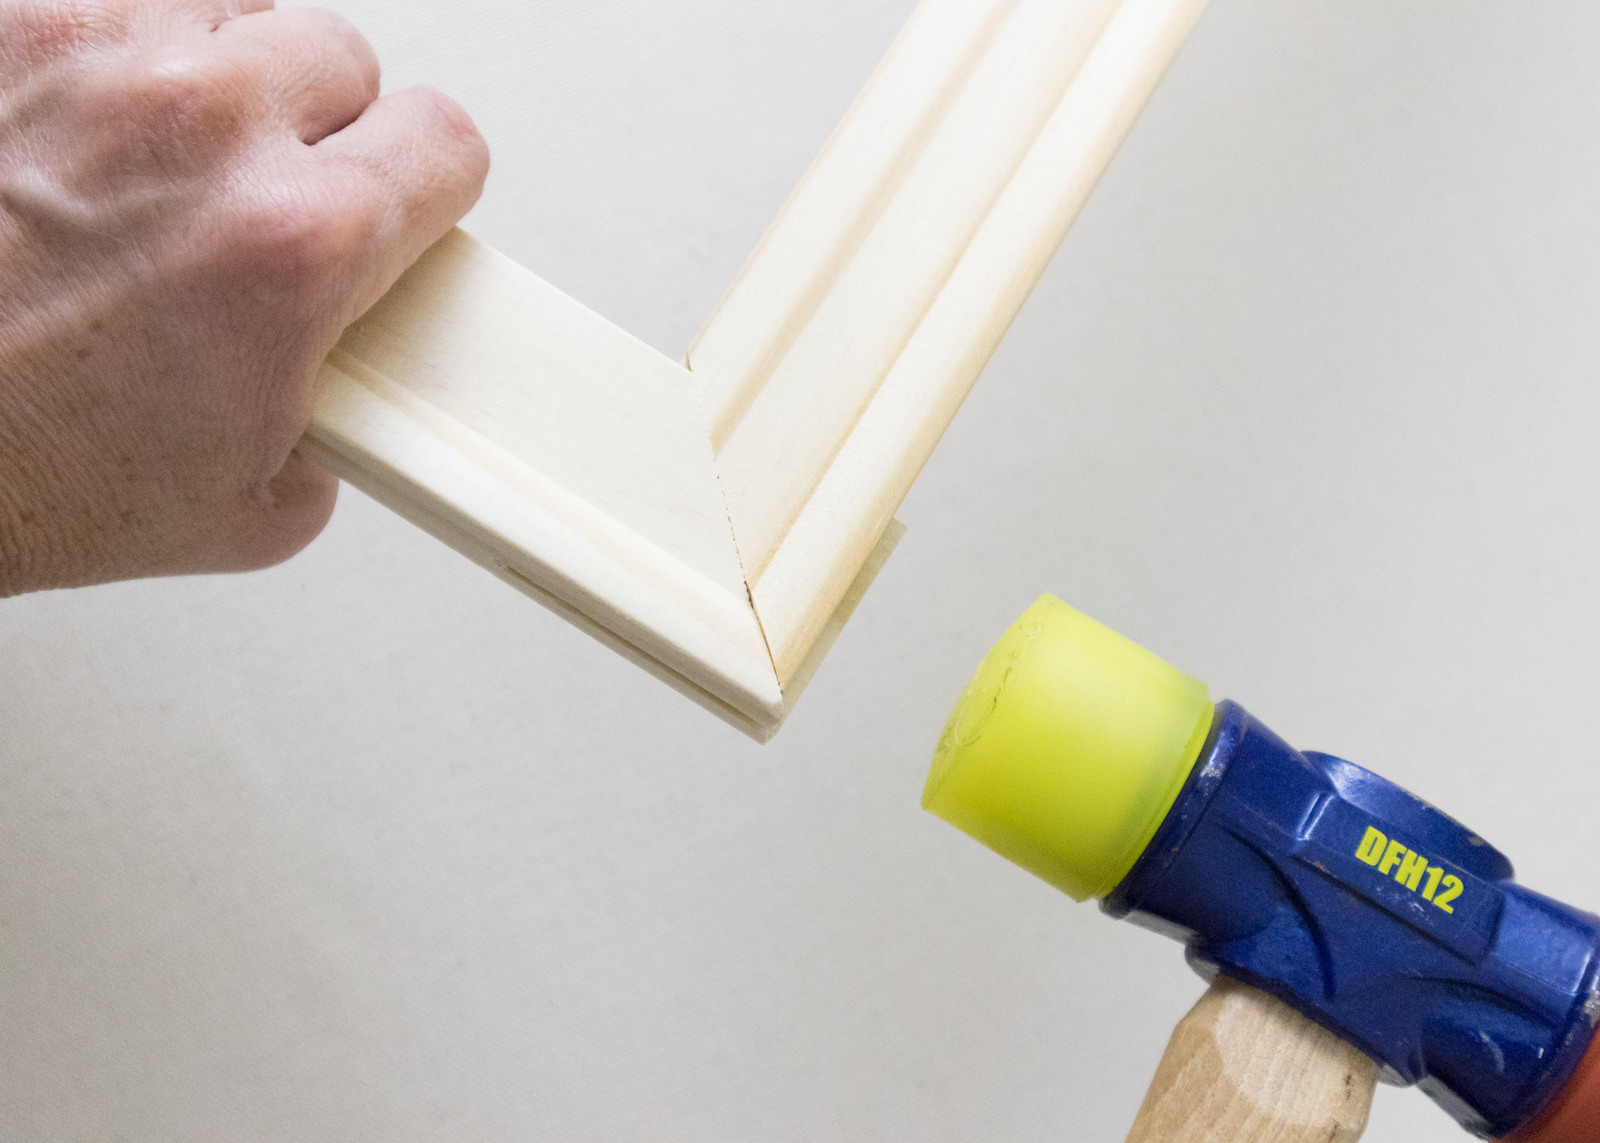
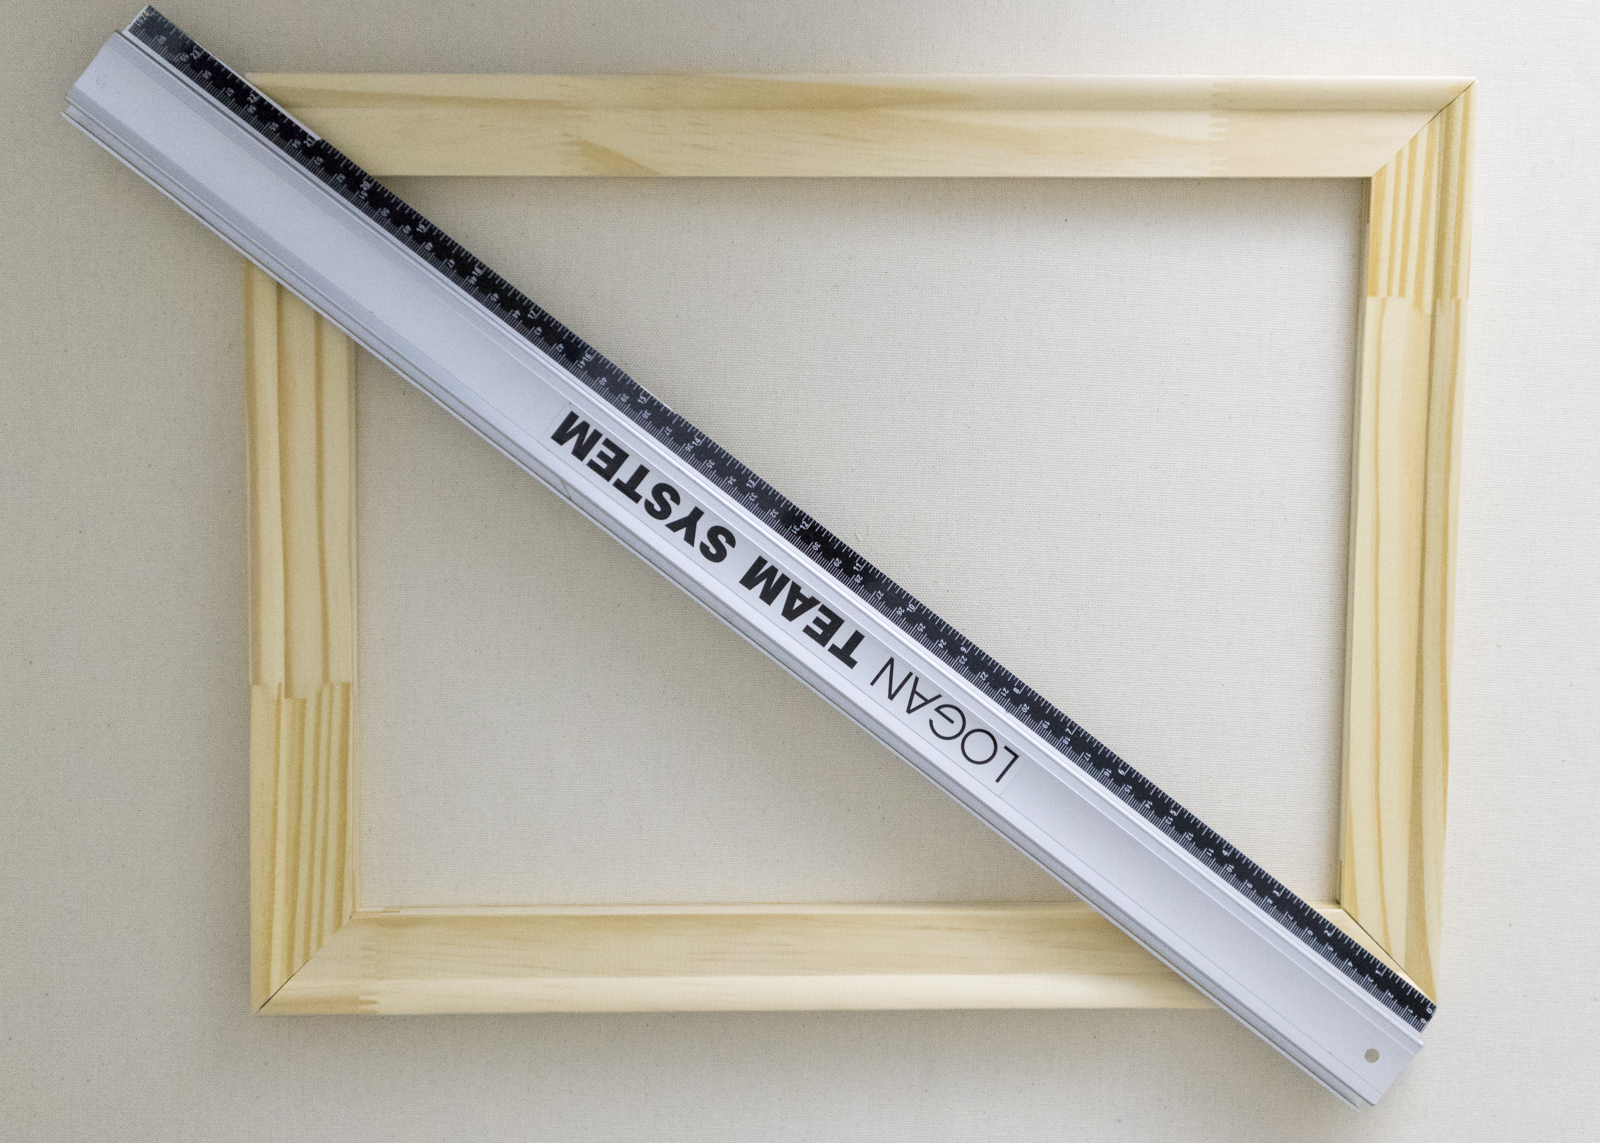
2. Using a rubber mallet, gently tap the pieces so they fit snugly. Once your frame is complete, use a ruler to make sure it is square. If it isn’t square, use the mallet to make it square.
Pouring the Paint:
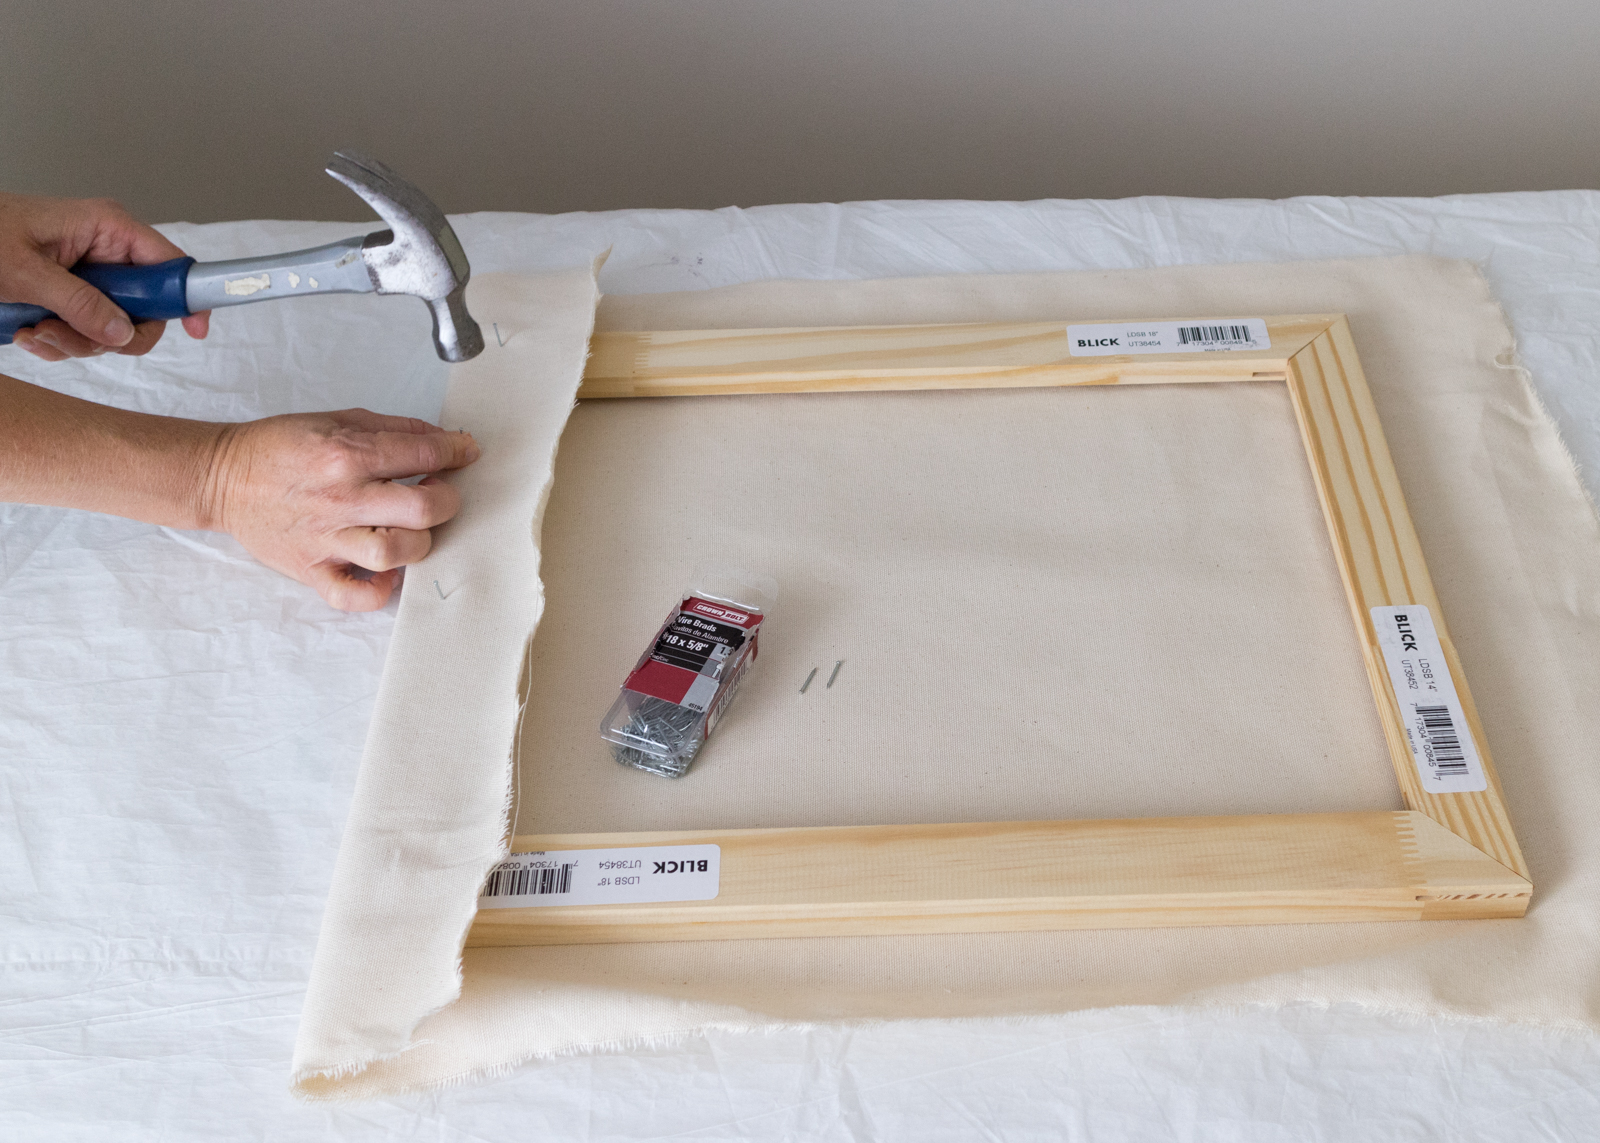
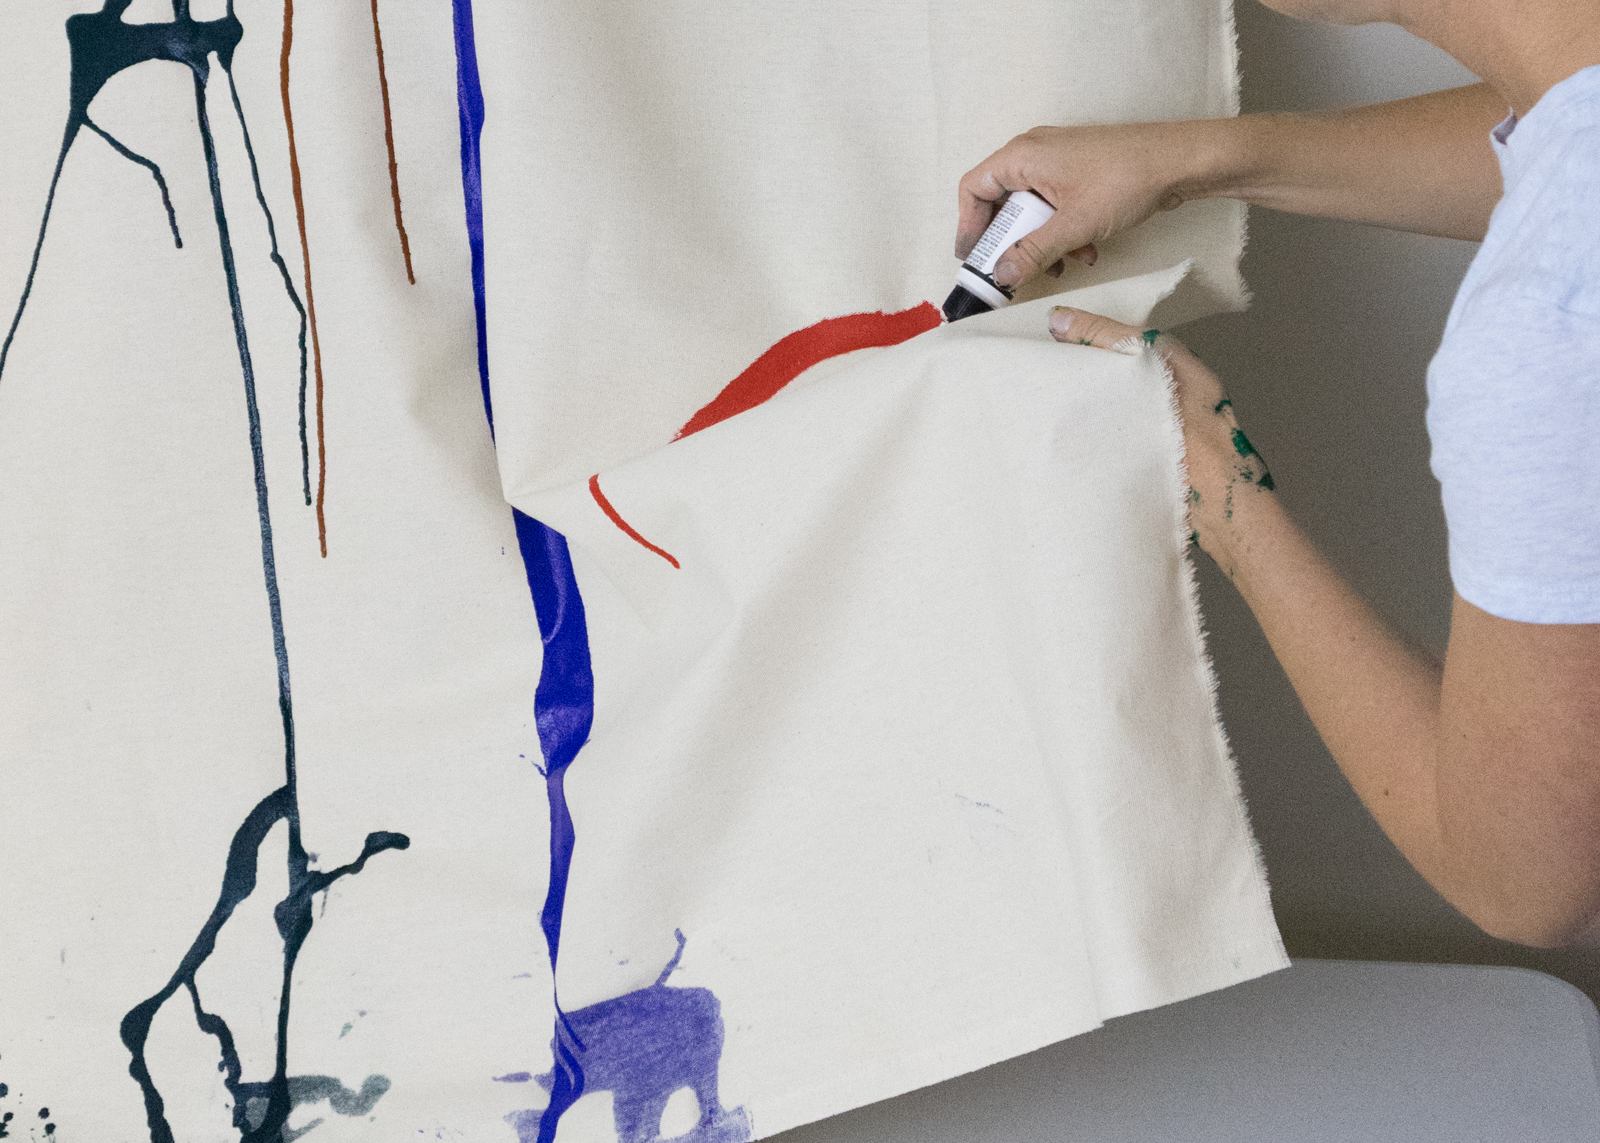
1. Cut a piece of unprimed canvas, larger than the size of your frame, from the role. Loosely tack the canvas to the top of the frame with nails. You can also tack the sides down if you wish. Play around with it and see what works for you.
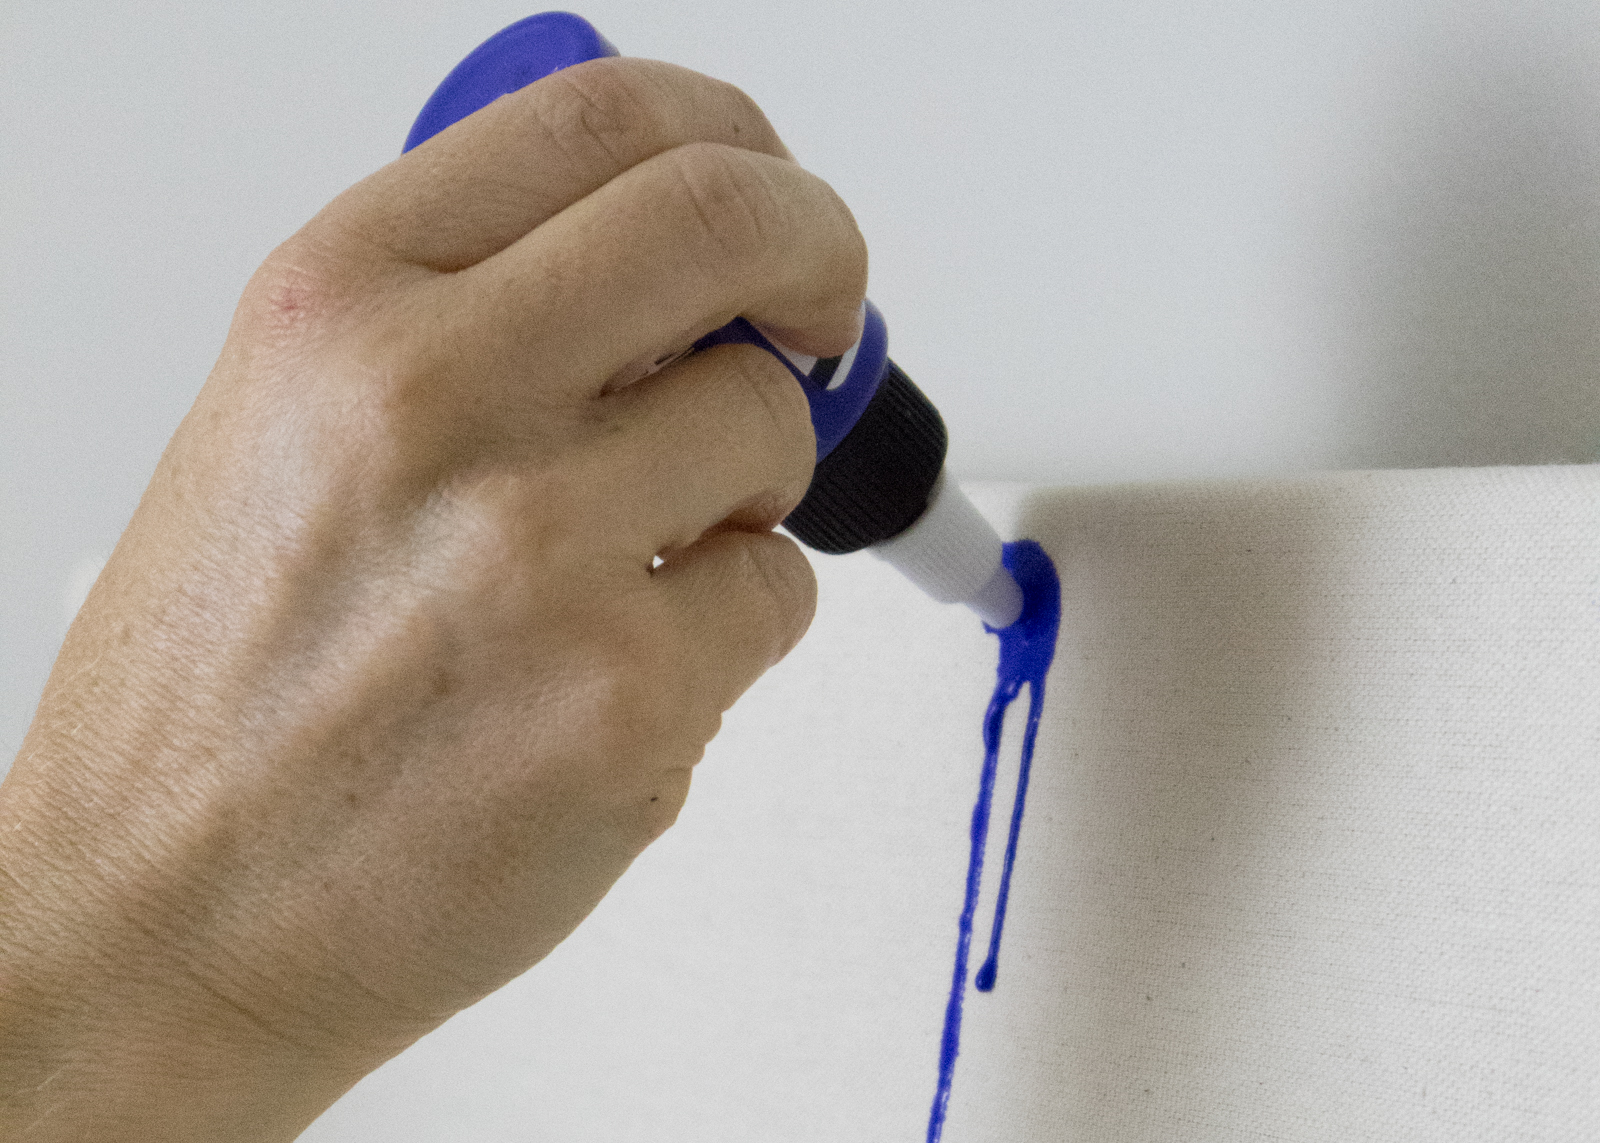
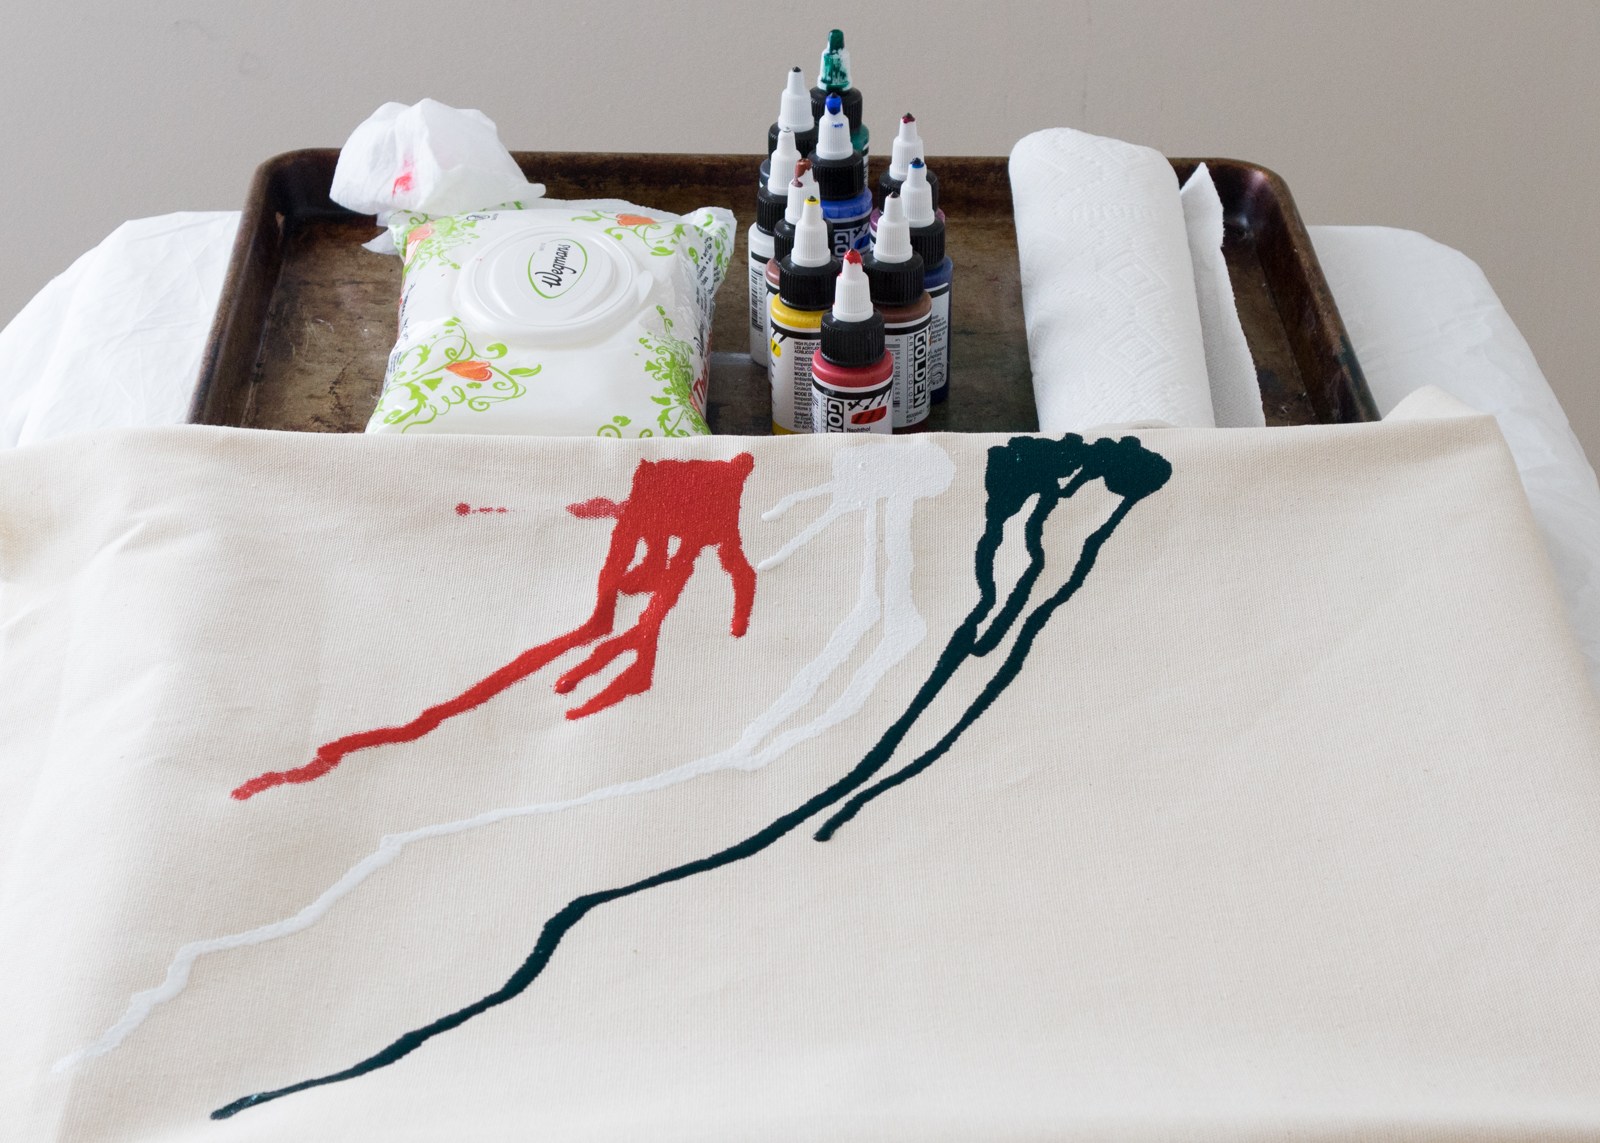
2. Use an easel or a wall to keep your frame upright. Place a cookie tray beneath the frame to catch dripping paint. Gently squeeze the paint bottle and let gravity do the work. My girls just used a glass jar to pour the paint onto the canvas.
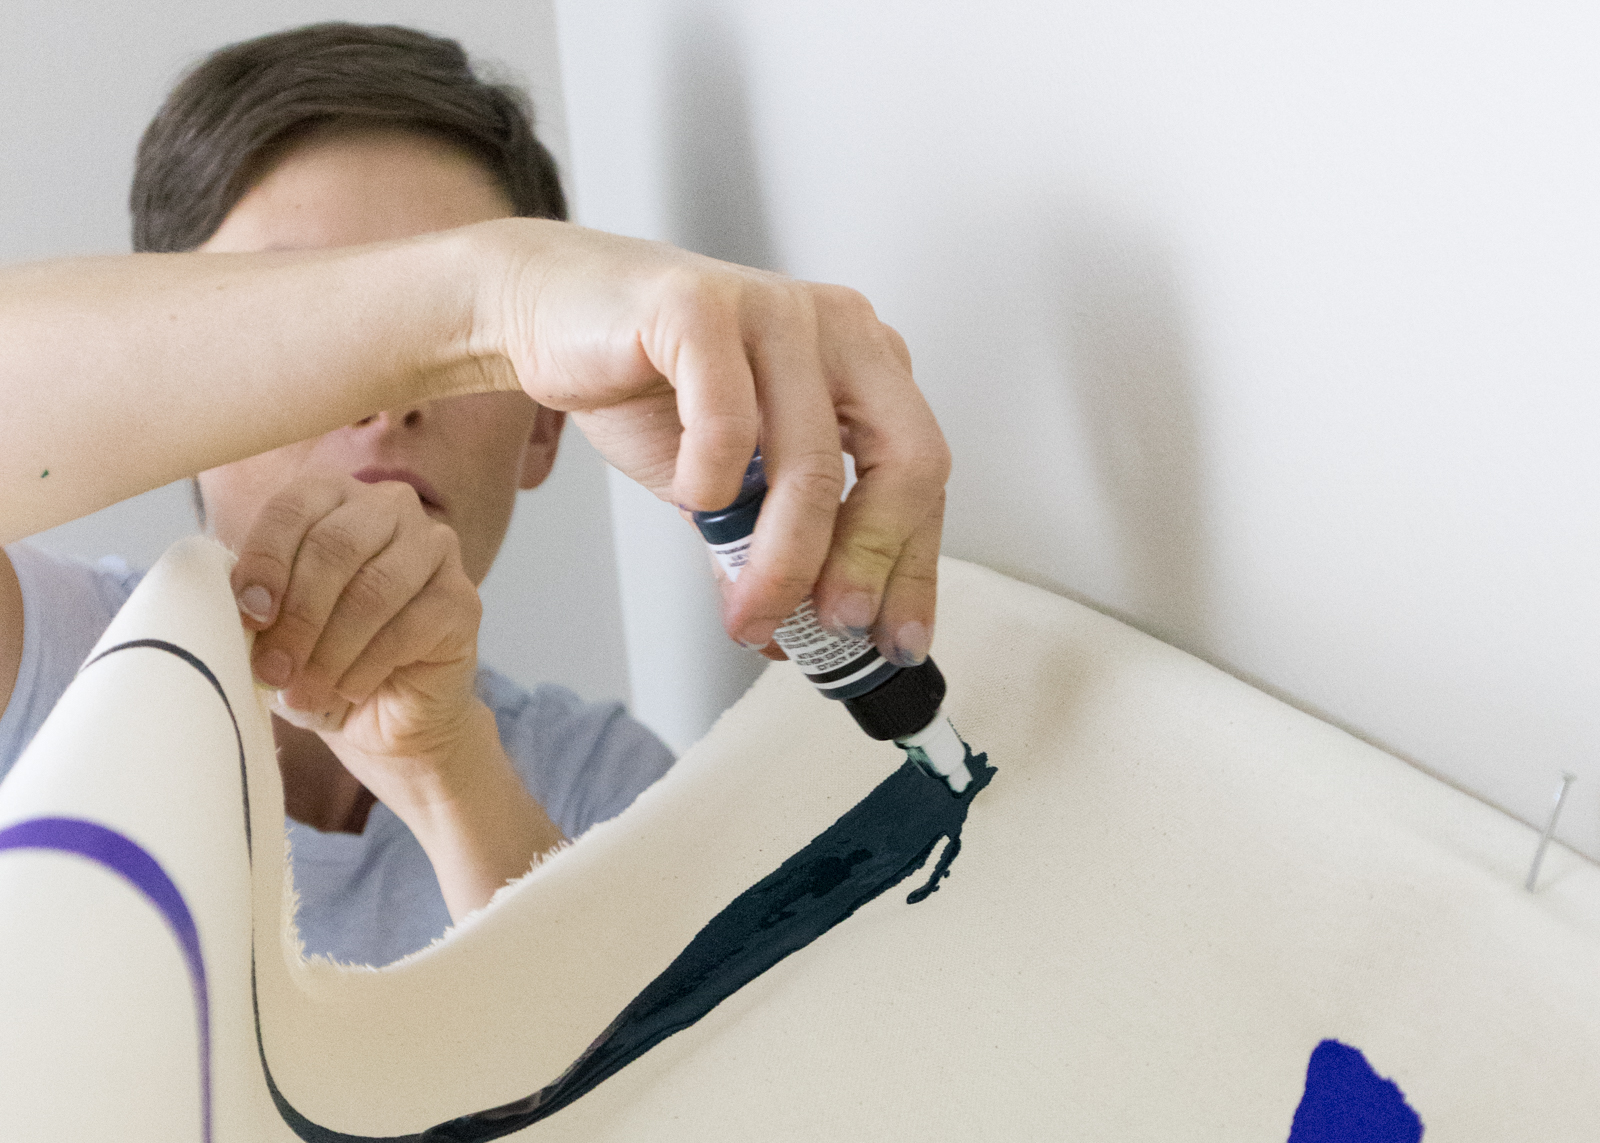
3. Here I was trying to create something similar to Louis’s paintings where the paint doesn’t overlap. I folded the canvas to control how quickly the paint made it to the bottom of the canvas. It was difficult to make a line the width I wanted and to maintain that width to the bottom of the canvas. It was difficult to control the paint in general!
3. I also tried to make something like Louis’s Unfurled paintings by starting on the side of the painting. Mess around with the paint and try different things.
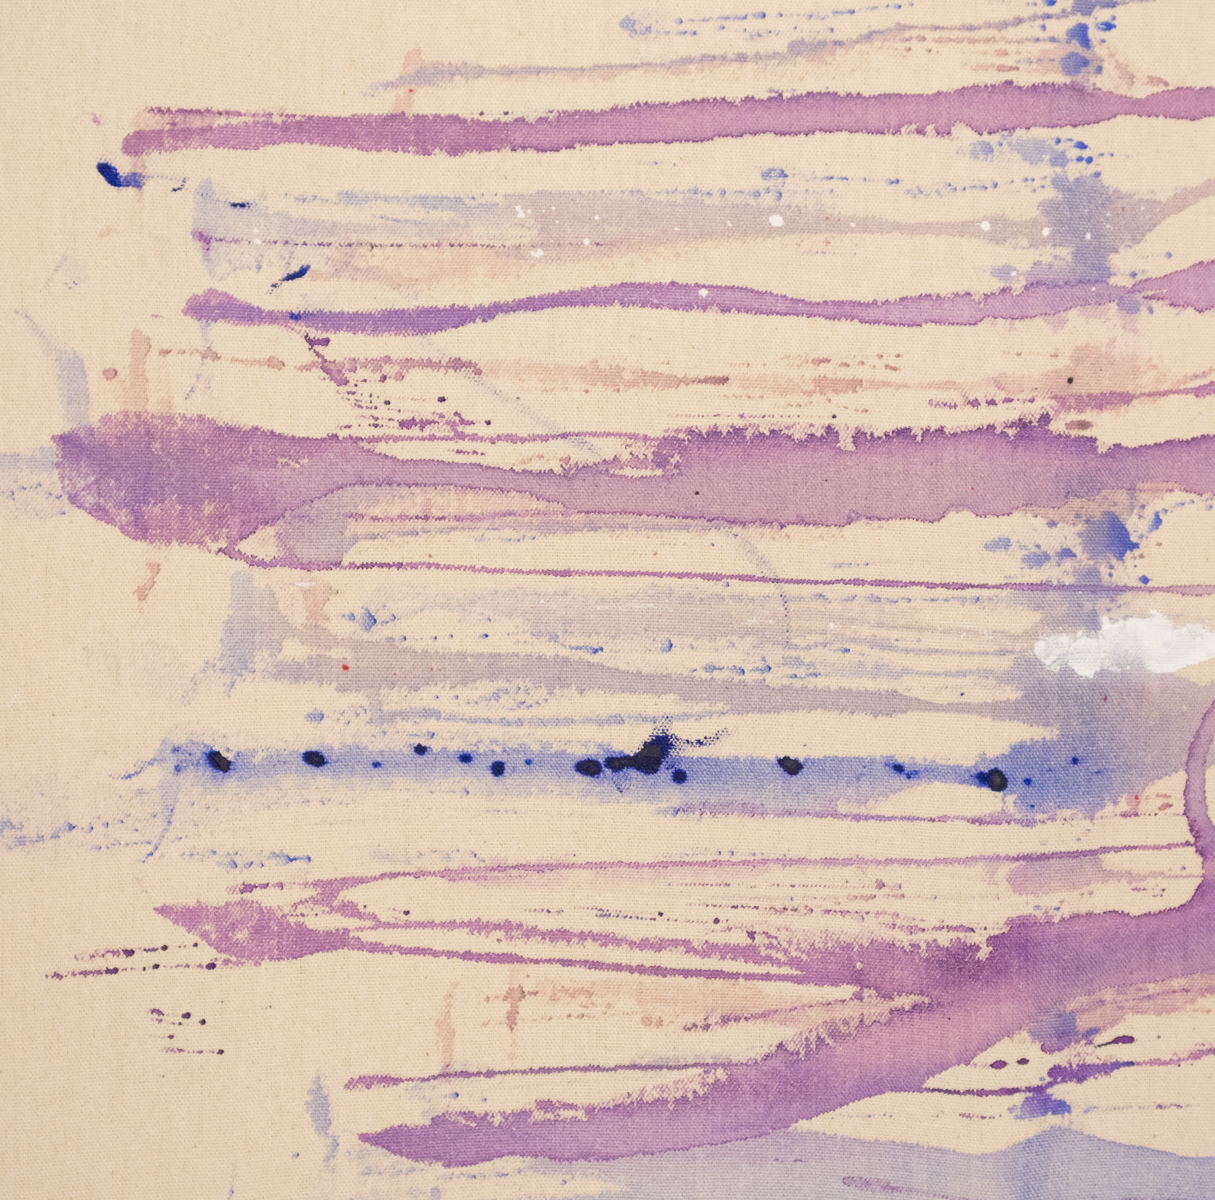
You can see my end result does not look anything like Louis's paintings. Even with Louis providing the idea for me I couldn't make anything similar. He was experimental and very disciplined in his work. Trying Louis's process myself gave me greater appreciation for what he was doing and creating. At first my pour paintings were frustrating. My sister-in-law gave me useful advice - enjoy it, whatever the end result is!
Stretching the Canvas:
1. Lay the frame on the table face up and the painted canvas on top of the frame face up. Determine what part of your canvas you want to be visible (sometimes Louis did multiple paintings on one large canvas and then cut the canvas into pieces for multiple paintings). If there is a portion of the painting you like best, be sure to make that part visible. You can always make a smaller or larger frame if you find that suits your painting better. Some of Louis's paintings are stretched so the portion where he poured the paint is visible as well as where the paint pooled at the bottom of the painting. In some of his paintings, they are stretched so those portions aren't visible.
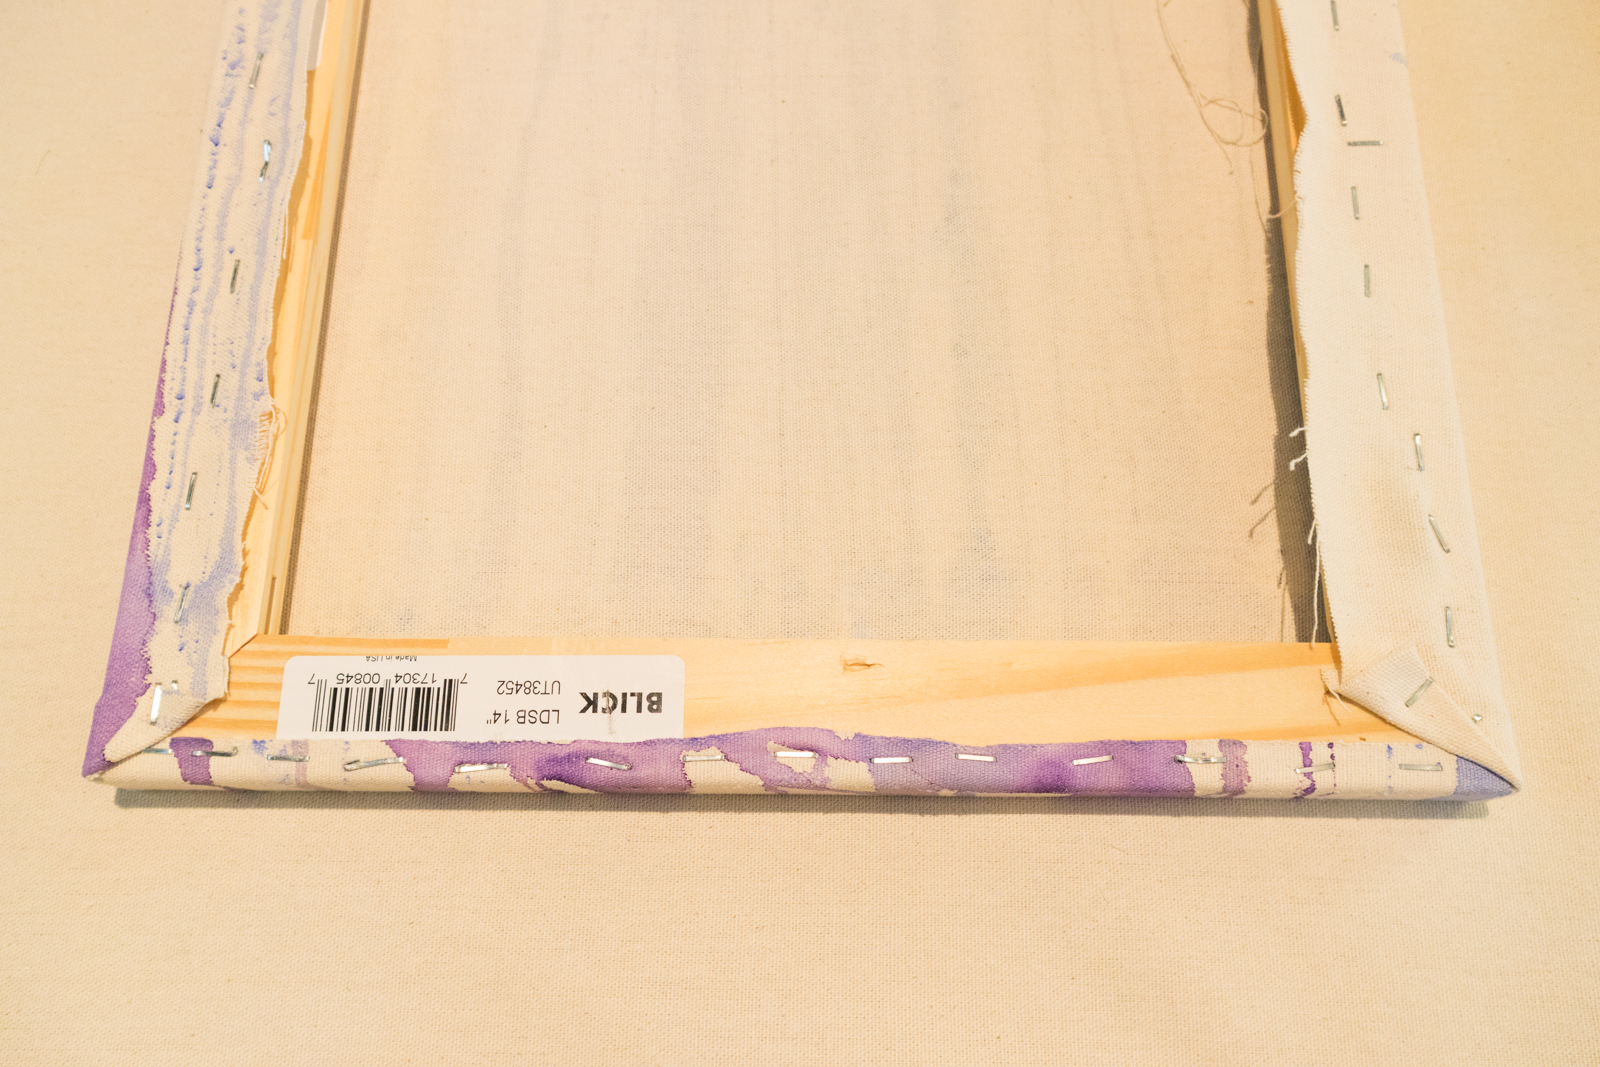
2. Flip your painting with the frame over so the front of the canvas is on the table and the frame is on top. Wrap the canvas to the back of the frame.
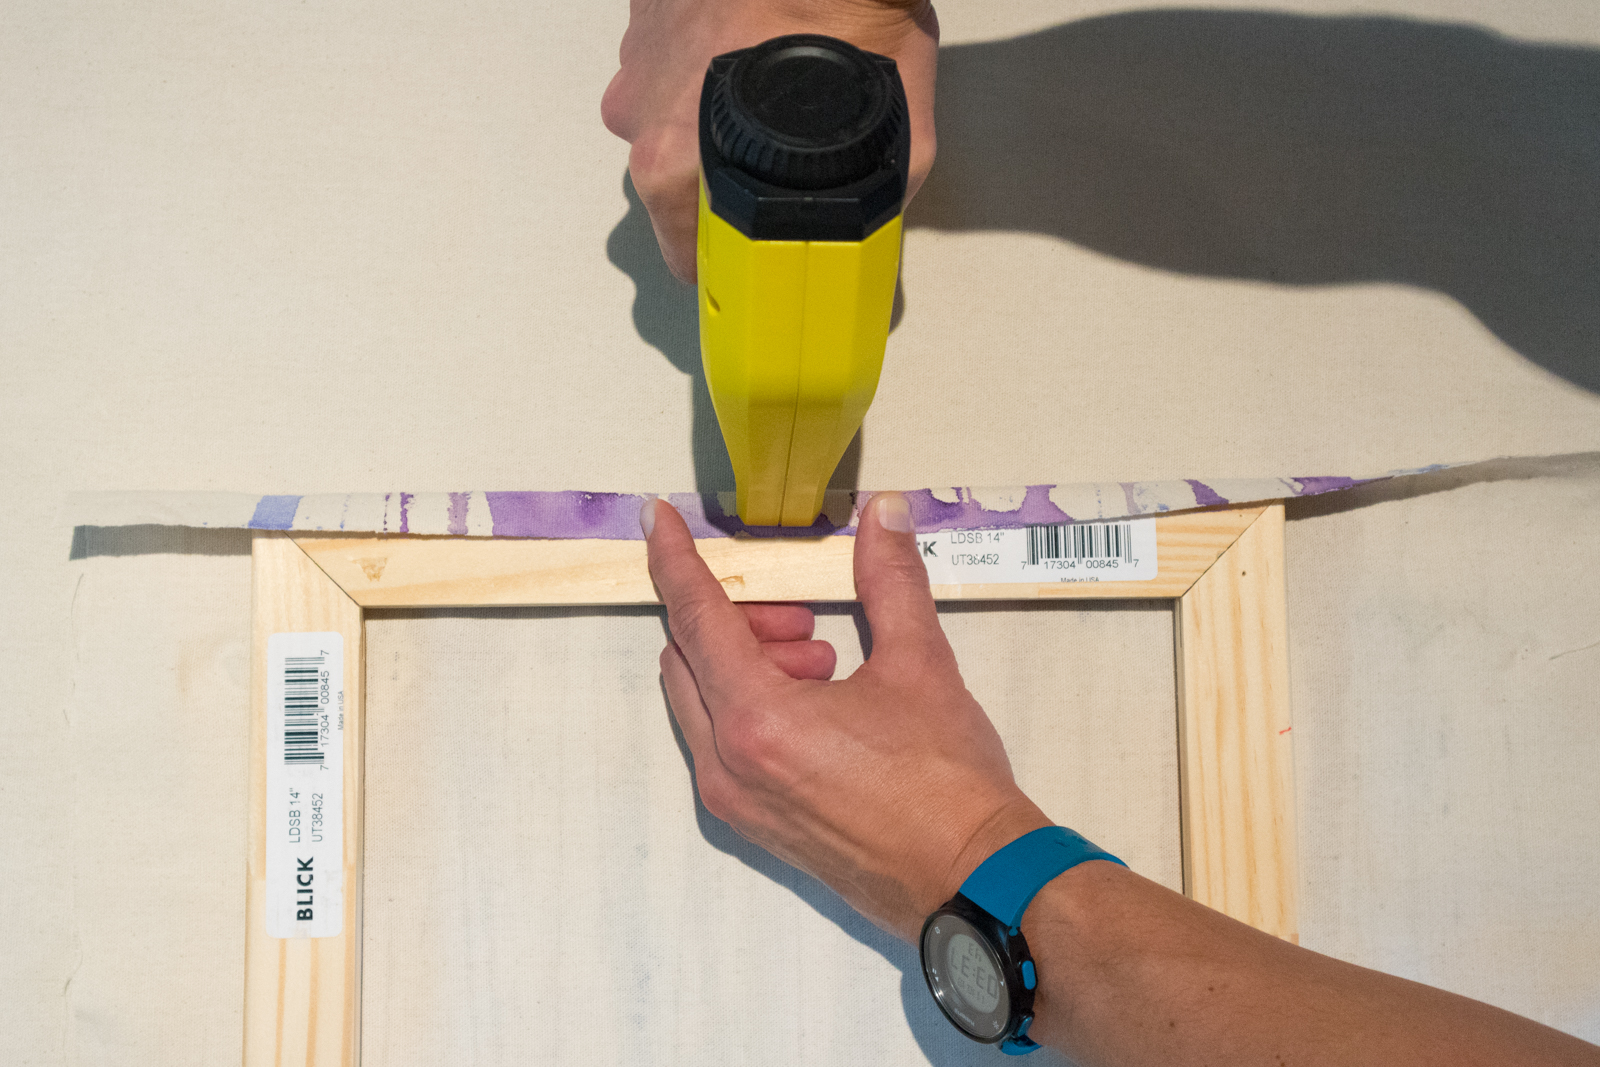

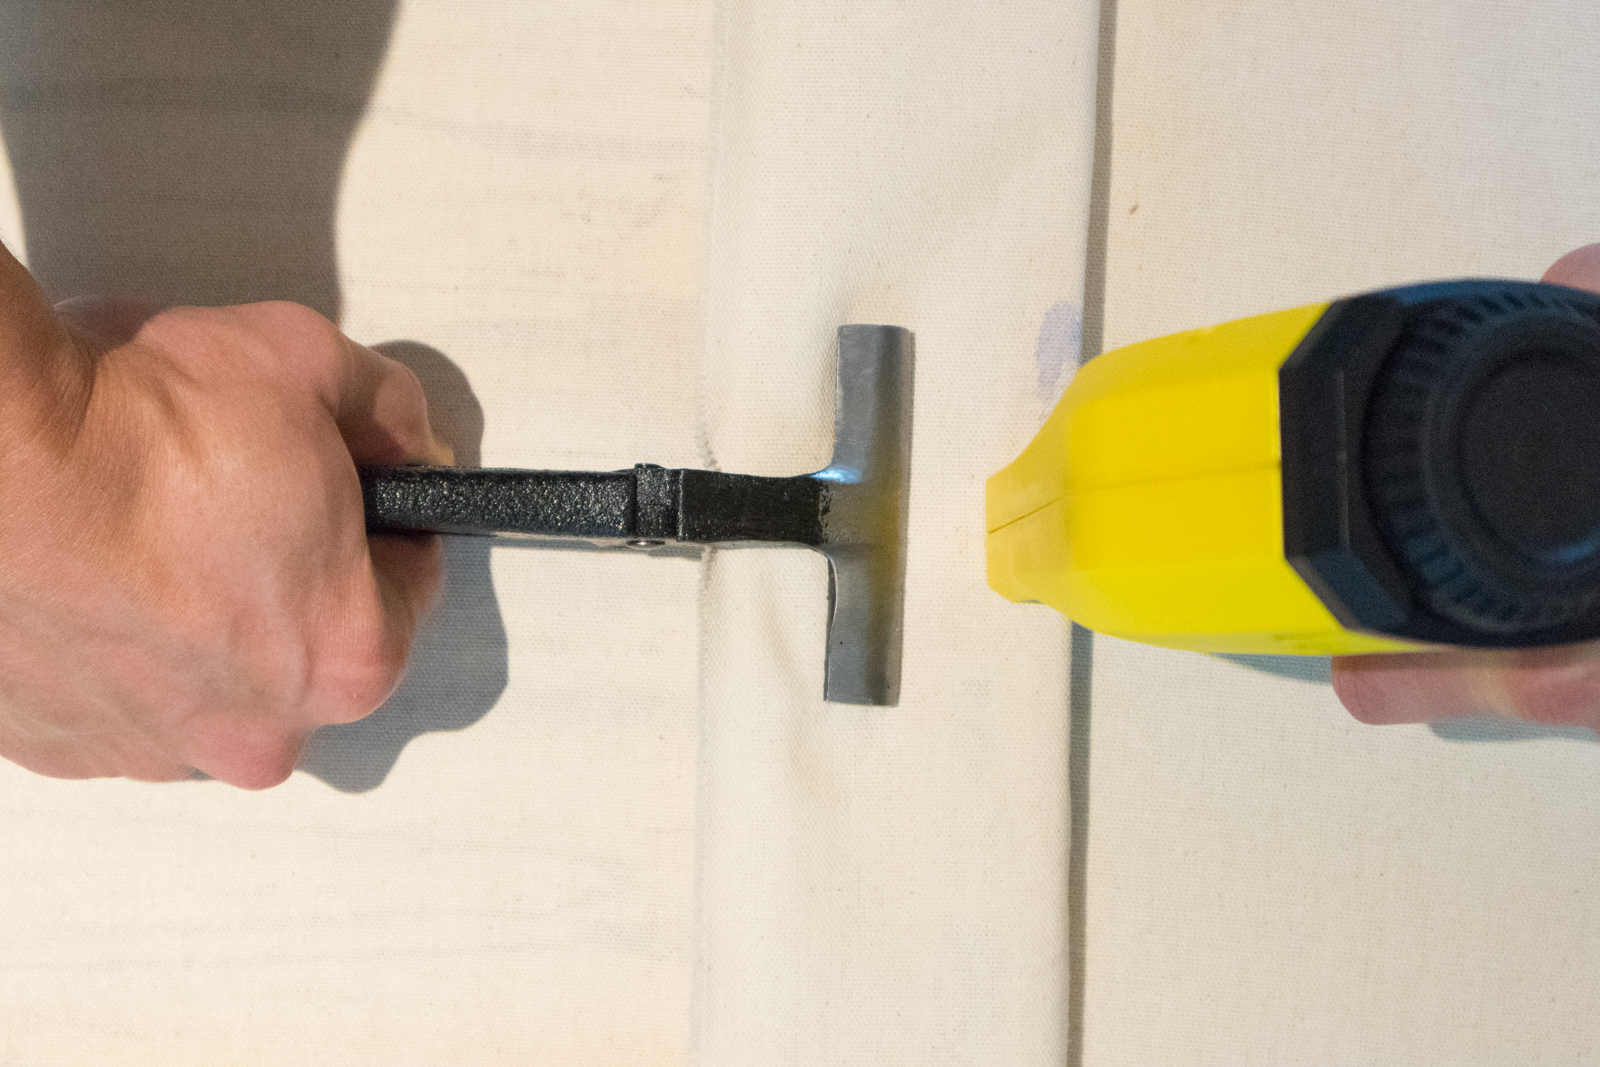
3. On one side of the back of the frame, staple a small section of the middle of the canvas to the middle of the frame. Hold the canvas taut with the stretching pliers on the opposite side of the canvas and put in a few staples in the center of that side of the frame and canvas. Continue stapling one side of the frame and then balancing that with staples on the opposite side of the frame. Repeat on the adjacent sides of the frame. Leave some space on each corner.
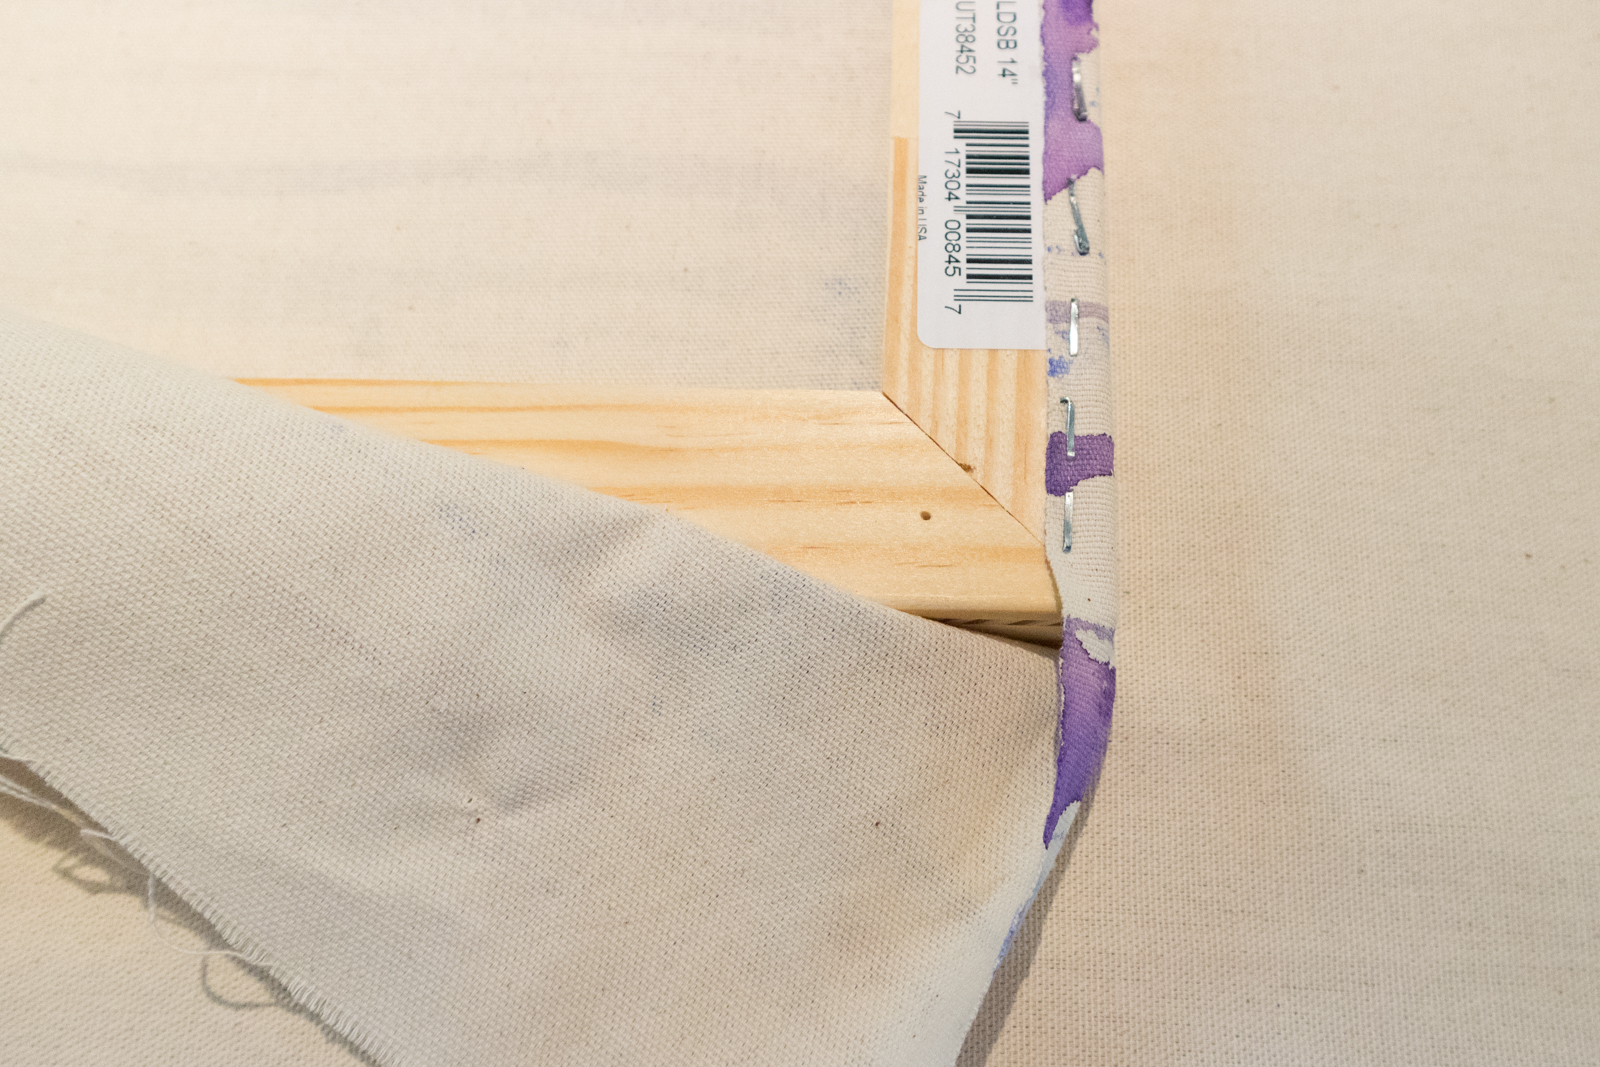
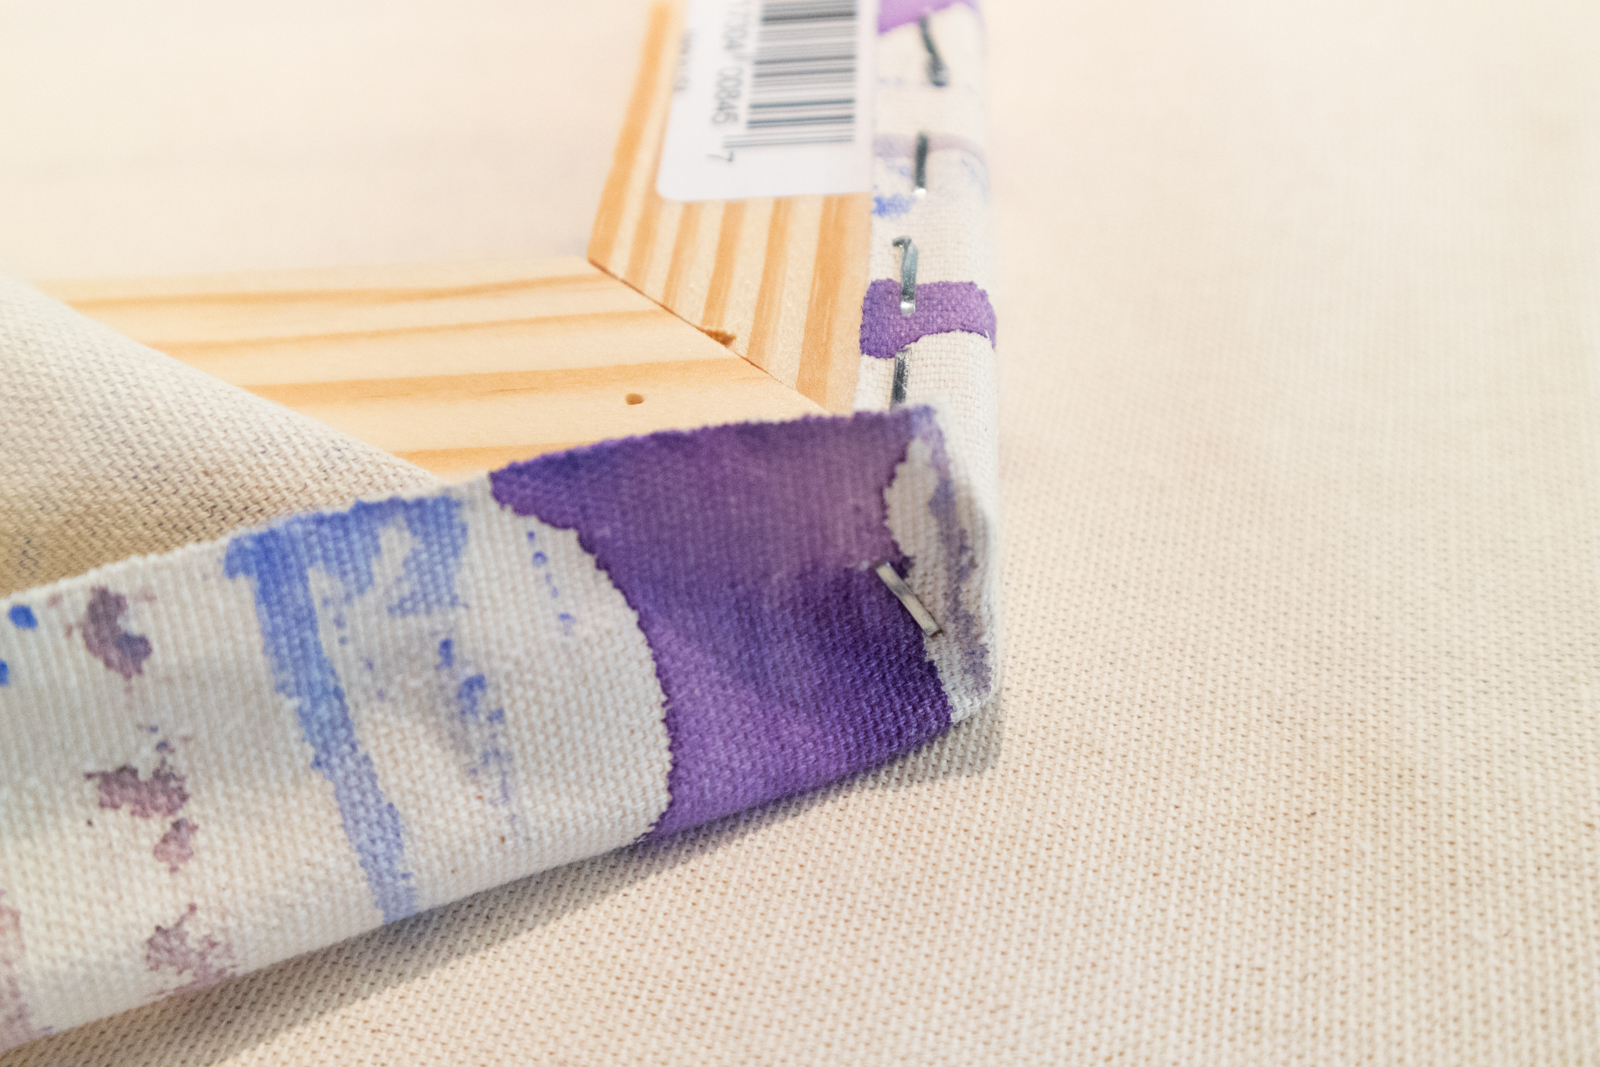

4. On one side of the back of the frame, staple to the edge of the frame. Pull the canvas tight around the corner and place one staple on the side where it will be covered when the adjacent fabric is pulled to the back. Pull the adjacent fabric to the back (kind of like tucking in sheets in the bottom corners of a bed) of the frame and staple. Trim excess fabric.
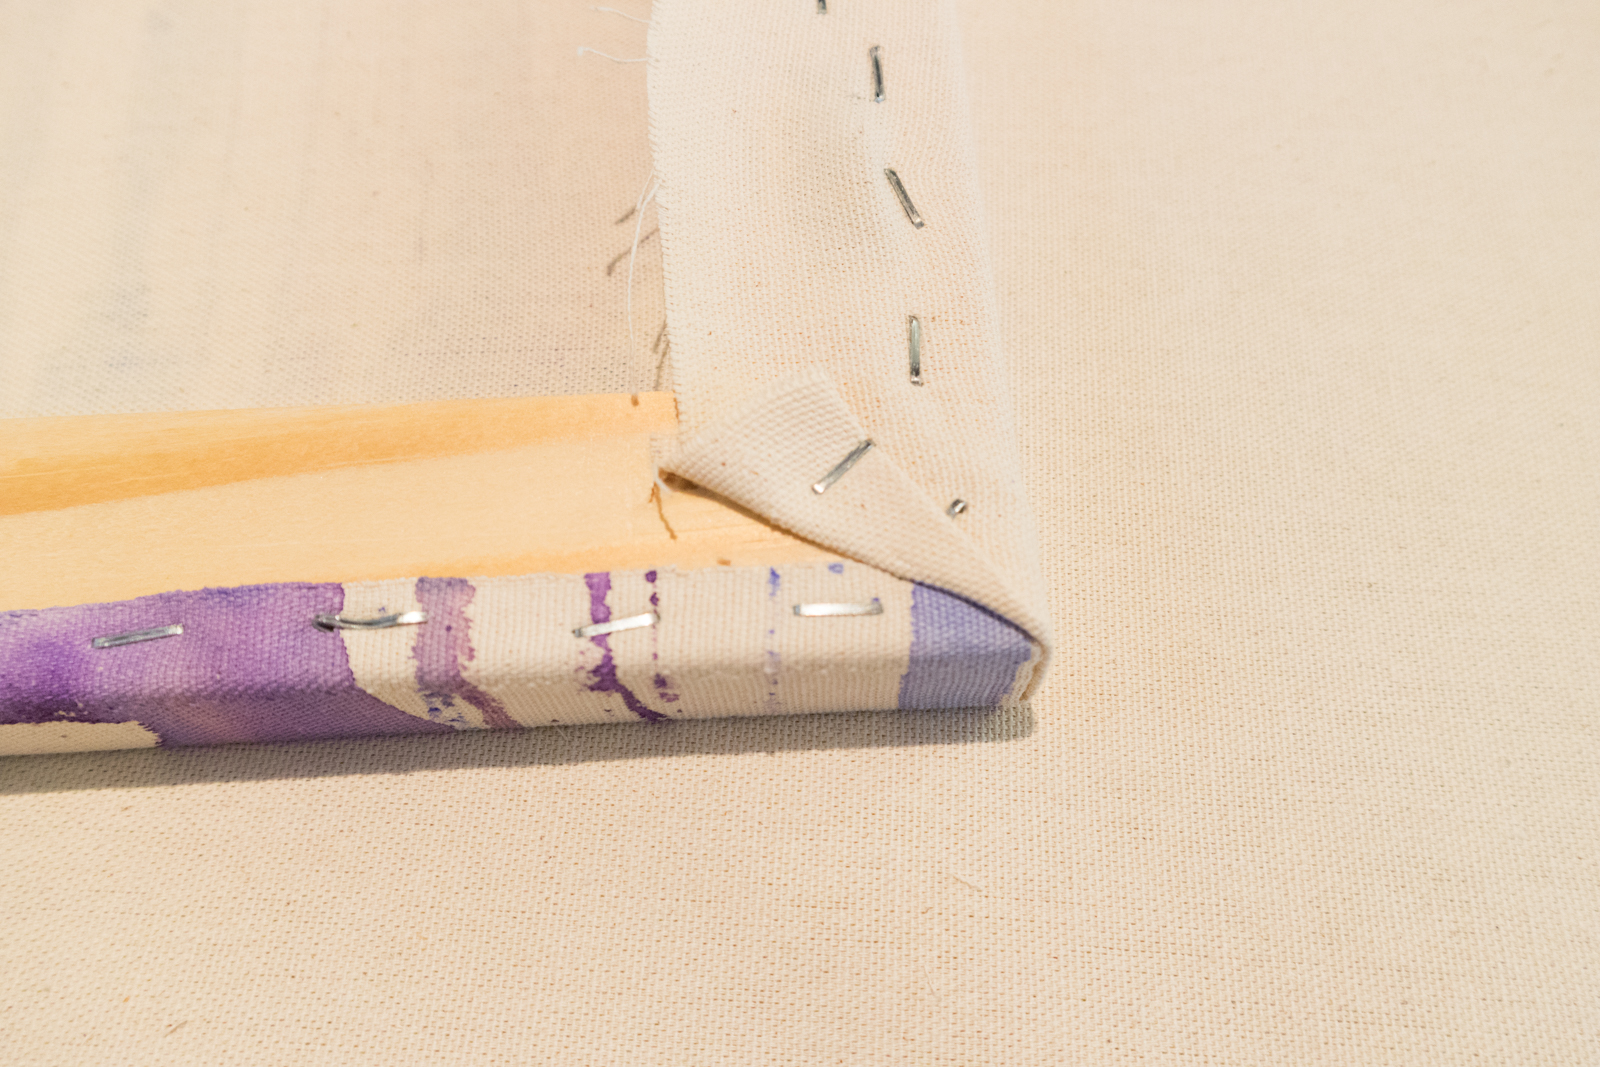
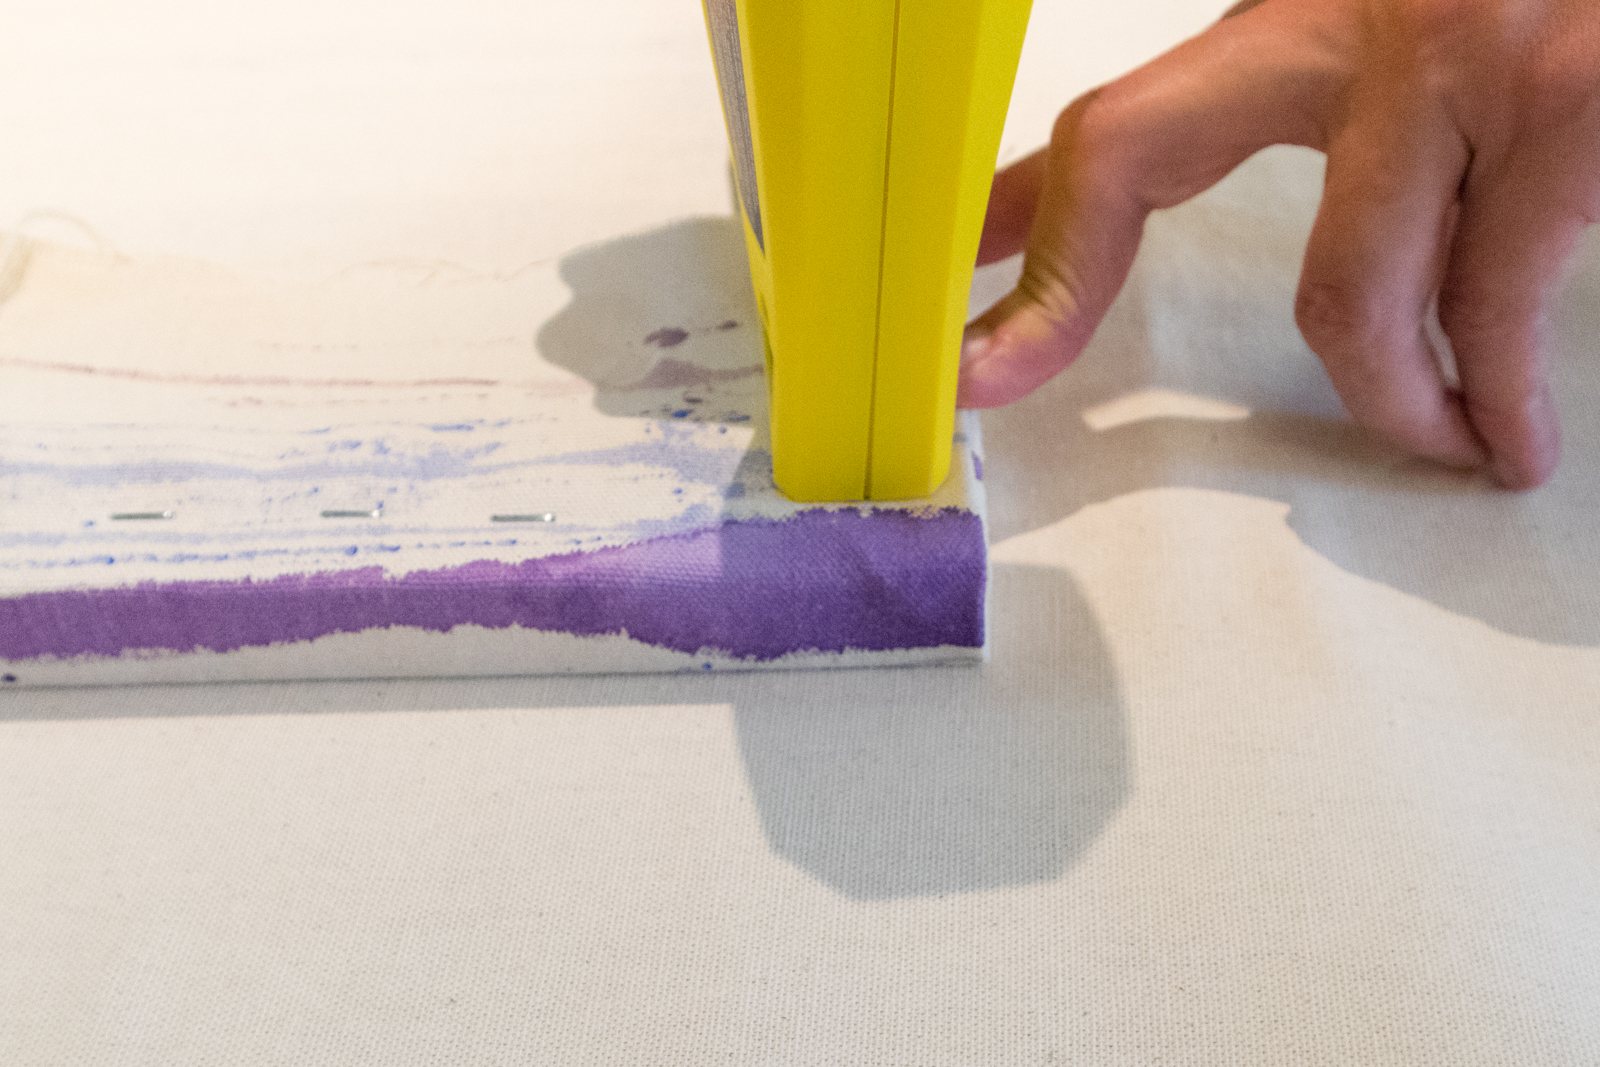
5. So that the edge of the fabric doesn't go over the edge of the frame, fold the fabric back and staple it. Repeat on the other corners.


Leave A Comment